

 中文
中文 

寂静的羽夏 deepin
2022-11-10 06:26 deepin 我的目前的建议是看源码(如下是关键代码):
    QCommandLineOption moduleOption("m", "the module' id of which to be shown.", "module");
    QCommandLineOption pageOption("p", "specified module page", "page");
...
    const QString &reqModule = parser.value(moduleOption);
    const QString &reqPage = parser.value(pageOption);
...
        if (!reqModule.isEmpty()) {
            DDBusSender()
            .service("com.deepin.dde.ControlCenter")
            .interface("com.deepin.dde.ControlCenter")
            .path("/com/deepin/dde/ControlCenter")
            .method("ShowPage")
            .arg(reqModule)
            .arg(reqPage)
            .call();
        }
        else if (parser.isSet(showOption) && !parser.isSet(dbusOption)) {
            DDBusSender()
            .service("com.deepin.dde.ControlCenter")
            .interface("com.deepin.dde.ControlCenter")
            .path("/com/deepin/dde/ControlCenter")
            .method("Show")
            .call();
        }
也就是说, -m 和 -p 参数其实就是调用 dbus ,这个 dbus ,我是研究过的,不过只是研究过网络的,不过有关其他模块,你可以通过我的指引进行检索(通过源码):
然后跟踪一下:
void DBusControlCenterService::ShowPage(const QString &module, const QString &page)
{
    parent()->initAllModule(module);

    static bool firstEnter = true;
    QStringList delayModule{"bluetooth"};
    if (delayModule.contains(module) && firstEnter) {
        firstEnter = false;
        //此时对应了dbus调用显示控制中心需要dbus同步方式数据
    }

    parent()->showModulePage(module, page, false);
}
这个 parent 正是 MainWindow,然后跟一下代码:
    m_modules = {
    #ifndef DISABLE_AUTHENTICATION
        { new LoginOptionsModule(this), tr("Biometric Authentication")},
    #endif
        { new AccountsModule(this), tr("Accounts")},
        { new DisplayModule(this), tr("Display")},
        { new TouchscreenModule(this), tr("Touch Screen")},
        { new DefaultAppsModule(this), tr("Default Applications")},
        { new PersonalizationModule(this), tr("Personalization")},
        { new NotificationModule(this), tr("Notification")},
        { new SoundModule(this), tr("Sound")},
        { new BluetoothModule(this), tr("Bluetooth")},
        { new DatetimeModule(this), tr("Date and Time")},
        { new PowerModule(this), tr("Power")},
        { new MouseModule(this), tr("Mouse")},
        { new WacomModule(this), tr("Drawing Tablet")},
        { new KeyboardModule(this), tr("Keyboard and Language")},
#ifndef DISABLE_SYS_UPDATE
        { new UpdateModule(this), tr("Updates")},
#endif
        { new SystemInfoModule(this), tr("System Info")},
        { new CommonInfoModule(this), tr("General Settings")},
    };
然后,我们的 module 的值,就差不多有了,据我观察,每个模块都有 name和 availPage属性,那个 name就是 -m 之后跟的值,availPage就是我们 -p 后面每个模块的值,举个例子:
const QString MouseModule::name() const
{
    return QStringLiteral("mouse");
}

QStringList MouseModule::availPage() const
{
    QStringList sl;
    sl << "General" << "Mouse";
    if (m_model->tpadExist()) {
        sl << "Touchpad";
    }
    if (m_model->redPointExist()) {
        sl << "TrackPoint";
    }
    return sl;
}
所以,我们可以这么使用:
dde-control-center -m "mouse" -p "General"
我们就可以打开鼠标的通用设置。
如果你想通过这个调出网络,不幸的是,这个是没有的,它是通过插件提供的:
const QString ModuleDirectory = "/usr/lib/dde-control-center/modules";
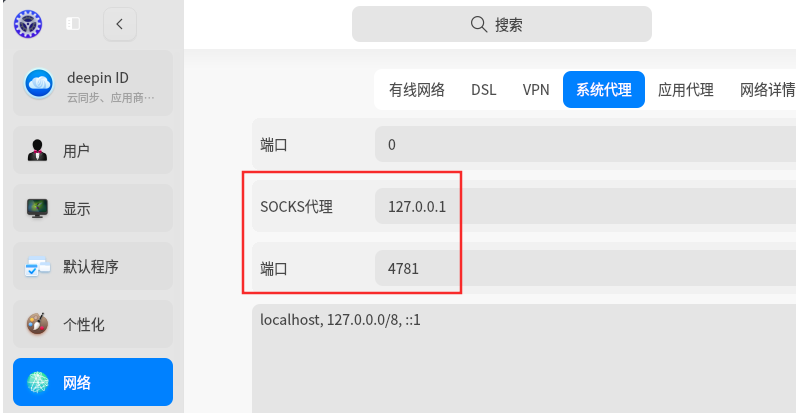
这个就是插件的路径,只要你找到对应插件的源码,就可以找到对应的值,有关网络的我没有找到它的源码,是通过逆向分析手段获得的值,如下:
[module]
network

[page]
System Proxy
DSL/Create PPPoE Connection
VPN
VPN/Create VPN
VPN/Import VPN
Application Proxy
Network Details
Wired Network
Wired Network/addWiredConnection
Wireless Network
WirelessPage
Personal Hotspot
Airplane Mode
module 就是所谓的 -m 后面跟的值,page 就是 -p 可以跟的值,如果 -m 是 network 。
Reply Like 2 View the author


在使用自定义快捷键时,打算制定一个打开控制中心指定位置的命令,想了解下dde-control-center -p 参数怎么使用。看help文档没有案例介绍,不确定需要追加什么值。有案例的话就非常感谢。
Options:
-h, --help Displays help on commandline options.
--help-all Displays help including Qt specific options.
-v, --version Displays version information.
-s, --show show control center(hide for default).
-t, --toggle toggle control center visible.
-d, --dbus, --startup on dbus
-m the module' id of which to be shown.
-p specified module page